Webhook Integration Guide [Coming Soon]
Note: The API response should always include the variables object in the following format:
Introduction
This guide will help you integrate and set up webhooks for inbound AI-powered calls. It explains how to configure webhook settings, set up an API receiver, and dynamically replace variables in AI-generated prompts.
Prerequisites
Before you begin, make sure you have:
- An account for your application.
- A valid URL to handle webhook calls.
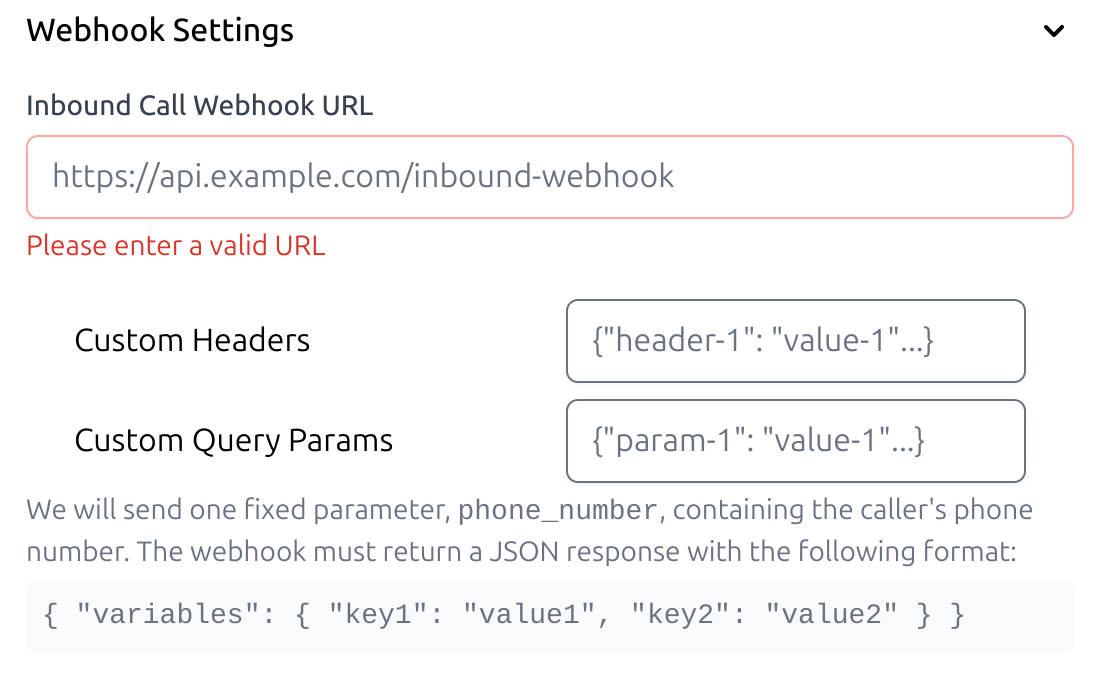
Configure Webhook Settings
To get started, set up your webhook URL, headers, and query parameters.
- Enter your webhook URL
- Add your API authentication details, such as bearer tokens or API keys.
- Include any dynamic parameters you wish to pass, such as customer_name and order_status.
Create an API Receiver
- Create an API endpoint to process incoming webhook requests.
app.get('/get-webhook', (req, res) => {
    console.log("Request Headers: ", req.headers);
    console.log("Request Query: ", req.query);

    // Respond with variables for AI prompt
    res.status(200).json({
        variables: {
            customer_name: "John Doe",
            order_status: "shipped"
        }
    });
});
Note: The API response should always include the variables object in the following format:
{
    "variables": {
        "customer_name": "John Doe",
        "order_status": "shipped"
    }
}
Replace Variable in AI Prompts
Use the returned variables from your webhook to dynamically update AI prompts.
Example Prompt in Call Flow Designer:
Hello, {{customer_name}}, your order status is {{order_status}}.When the webhook processes the request, variables are replaced dynamically:
Hello, John Doe, your order status is shipped.