Hello React
; } ``` ### Vue ```htmlHello Vue
``` ### Svelte ```htmlHello Svelte
``` ```mdx Integrate Trillet AI with Make.com **custom node** to automate **outbound voice call workflows**. This is ideal for building call-based campaigns, customer notifications, or voice follow-ups powered by Trillet AI.
### Installation
To add TrilletAI's app to your Make.com organization:
You can find TrilletAI directly on Make.com by searching **"TrilletAI"** in the App list under the `us1` or `us2` regions.
If TrilletAI does not appear in your region or account, use the invitation link below to add it manually:
🔗 **[Click here to install](https://www.make.com/en/hq/app-invitation/380f3212527664bd958eb3bf383c97fe)** if it doesn't appear.
## n8n Integration
Integrate Trillet AI with Make.com **custom node** to automate **outbound voice call workflows**. This is ideal for building call-based campaigns, customer notifications, or voice follow-ups powered by Trillet AI.
### Installation
To add TrilletAI's app to your Make.com organization:
You can find TrilletAI directly on Make.com by searching **"TrilletAI"** in the App list under the `us1` or `us2` regions.
If TrilletAI does not appear in your region or account, use the invitation link below to add it manually:
🔗 **[Click here to install](https://www.make.com/en/hq/app-invitation/380f3212527664bd958eb3bf383c97fe)** if it doesn't appear.
## n8n Integration
 TrilletAI provides a **custom node** for [n8n](https://n8n.io) to let you trigger **outbound voice calls** directly within your workflows. This allows you to automate call-based sequences based on custom events, user actions, or external system triggers.
### Installation Steps
1. Ensure `n8n` is installed on your machine. If not, follow [n8n installation guide](https://docs.n8n.io/).
2. Open your terminal and install the TrilletAI node package:
```bash
npm install n8n-trillet-nodes
```
---
## SDK Integration
TrilletAI provides a **custom node** for [n8n](https://n8n.io) to let you trigger **outbound voice calls** directly within your workflows. This allows you to automate call-based sequences based on custom events, user actions, or external system triggers.
### Installation Steps
1. Ensure `n8n` is installed on your machine. If not, follow [n8n installation guide](https://docs.n8n.io/).
2. Open your terminal and install the TrilletAI node package:
```bash
npm install n8n-trillet-nodes
```
---
## SDK Integration
 The Trillet AI Web SDK allows you to integrate **AI-powered voice agents** directly into your website or web application. This enables users to interact with your Trillet AI agents via voice or text calls, ideal for embedding real-time AI conversations in client-facing apps, demos, or custom workflows. The SDK handles real-time audio and supports features like transcription, audio analysis, and event emitting.
### Installation
You can install the SDK via npm for modern web frameworks (e.g., React, Next.js) or load it directly from a CDN for simple HTML integrations.
#### Via npm
1. Install the package:
```bash
npm install @trillet-ai/web-sdk
```
2. Import and use in your code:
```typescript
import { TrilletAgent } from '@trillet-ai/web-sdk';
```
#### Via CDN (No Build Tools Required)
Include the SDK script in your HTML:
```html
```
**Note:** The SDK requires a browser environment with secure context (HTTPS or localhost). It does not support server-side rendering.
### Configuration
Initialize a `TrilletAgent` instance:
```typescript
const agent = new TrilletAgent({
workspaceId: 'your-workspace-id',
agentId: 'your-agent-id',
variables: { key: 'value' },
mode: 'voice',
});
```
### Usage
1. **Start a Call:**
- Use `startPublicCall()` for public (workspace-based) integrations.
- Use `startCall()` for API key authenticated calls.
```typescript
try {
await agent.startPublicCall();
console.log('Call started');
} catch (error) {
console.error('Failed to start call:', error);
}
```
2. **End a Call:**
```typescript
agent.endCall();
```
3. **Toggle Microphone:**
```typescript
agent.toggleMicrophone(true); // Enable microphone
```
4. **Event Handling:**
The SDK extends `EventEmitter`. Listen for events like `connected`, `disconnected`, `error`, `assistantStartedSpeaking`, etc.
```typescript
agent.on('connected', (details) => {
console.log('Connected:', details.callId, details.agent.name);
});
agent.on('disconnected', () => {
console.log('Call ended');
});
agent.on('error', (error) => {
console.error('Error:', error);
});
```
5. **Transcripts:**
Access real-time and final transcripts:
```typescript
const transcripts = agent.getTranscripts(); // Array of Transcript objects
const current = agent.getCurrentTranscript(); // Partial transcripts
```
### SDK Integration Preview
The Trillet AI Web SDK allows you to integrate **AI-powered voice agents** directly into your website or web application. This enables users to interact with your Trillet AI agents via voice or text calls, ideal for embedding real-time AI conversations in client-facing apps, demos, or custom workflows. The SDK handles real-time audio and supports features like transcription, audio analysis, and event emitting.
### Installation
You can install the SDK via npm for modern web frameworks (e.g., React, Next.js) or load it directly from a CDN for simple HTML integrations.
#### Via npm
1. Install the package:
```bash
npm install @trillet-ai/web-sdk
```
2. Import and use in your code:
```typescript
import { TrilletAgent } from '@trillet-ai/web-sdk';
```
#### Via CDN (No Build Tools Required)
Include the SDK script in your HTML:
```html
```
**Note:** The SDK requires a browser environment with secure context (HTTPS or localhost). It does not support server-side rendering.
### Configuration
Initialize a `TrilletAgent` instance:
```typescript
const agent = new TrilletAgent({
workspaceId: 'your-workspace-id',
agentId: 'your-agent-id',
variables: { key: 'value' },
mode: 'voice',
});
```
### Usage
1. **Start a Call:**
- Use `startPublicCall()` for public (workspace-based) integrations.
- Use `startCall()` for API key authenticated calls.
```typescript
try {
await agent.startPublicCall();
console.log('Call started');
} catch (error) {
console.error('Failed to start call:', error);
}
```
2. **End a Call:**
```typescript
agent.endCall();
```
3. **Toggle Microphone:**
```typescript
agent.toggleMicrophone(true); // Enable microphone
```
4. **Event Handling:**
The SDK extends `EventEmitter`. Listen for events like `connected`, `disconnected`, `error`, `assistantStartedSpeaking`, etc.
```typescript
agent.on('connected', (details) => {
console.log('Connected:', details.callId, details.agent.name);
});
agent.on('disconnected', () => {
console.log('Call ended');
});
agent.on('error', (error) => {
console.error('Error:', error);
});
```
5. **Transcripts:**
Access real-time and final transcripts:
```typescript
const transcripts = agent.getTranscripts(); // Array of Transcript objects
const current = agent.getCurrentTranscript(); // Partial transcripts
```
### SDK Integration Preview
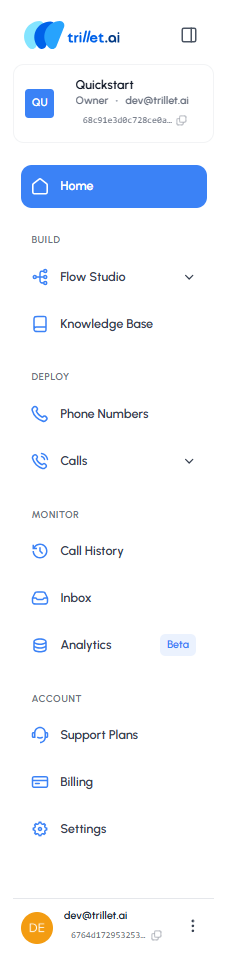
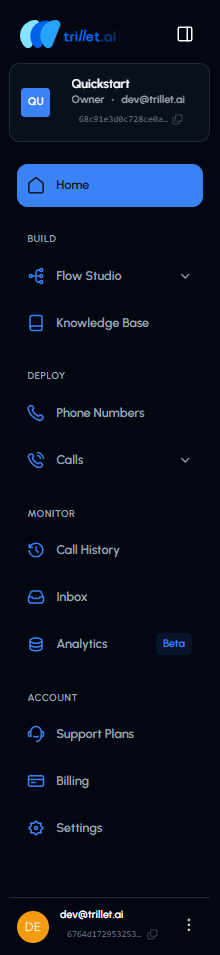 2. **Navigate the Interface**: From the Side Panel, you can navigate to all sections of the Trillet interface. Each section has its own functionality, which we'll explore as we move through this handbook.
3. **Start with Flow Studio**:
- In the Side Panel, click **Flow Studio**
- This will open a dropdown menu with two options: [Call Flows](/v1/api-reference/endpoints/flows/call-flows/create) and [Message Flows](/v1/api-reference/endpoints/flows/message-flows/create)
4. **Choose Your Flow Type**: Trillet lets you create both, depending on your use case. In this module, we'll start with a Call Flow.
### Understanding Call Flows
A Call Flow is the backbone of your AI agent. It defines how conversations are structured and whether your agent will handle one-way or two-way communication. You can think of it like a blueprint for your agent's calls.
After navigating to Call Flows, your dashboard will look like this:
2. **Navigate the Interface**: From the Side Panel, you can navigate to all sections of the Trillet interface. Each section has its own functionality, which we'll explore as we move through this handbook.
3. **Start with Flow Studio**:
- In the Side Panel, click **Flow Studio**
- This will open a dropdown menu with two options: [Call Flows](/v1/api-reference/endpoints/flows/call-flows/create) and [Message Flows](/v1/api-reference/endpoints/flows/message-flows/create)
4. **Choose Your Flow Type**: Trillet lets you create both, depending on your use case. In this module, we'll start with a Call Flow.
### Understanding Call Flows
A Call Flow is the backbone of your AI agent. It defines how conversations are structured and whether your agent will handle one-way or two-way communication. You can think of it like a blueprint for your agent's calls.
After navigating to Call Flows, your dashboard will look like this:
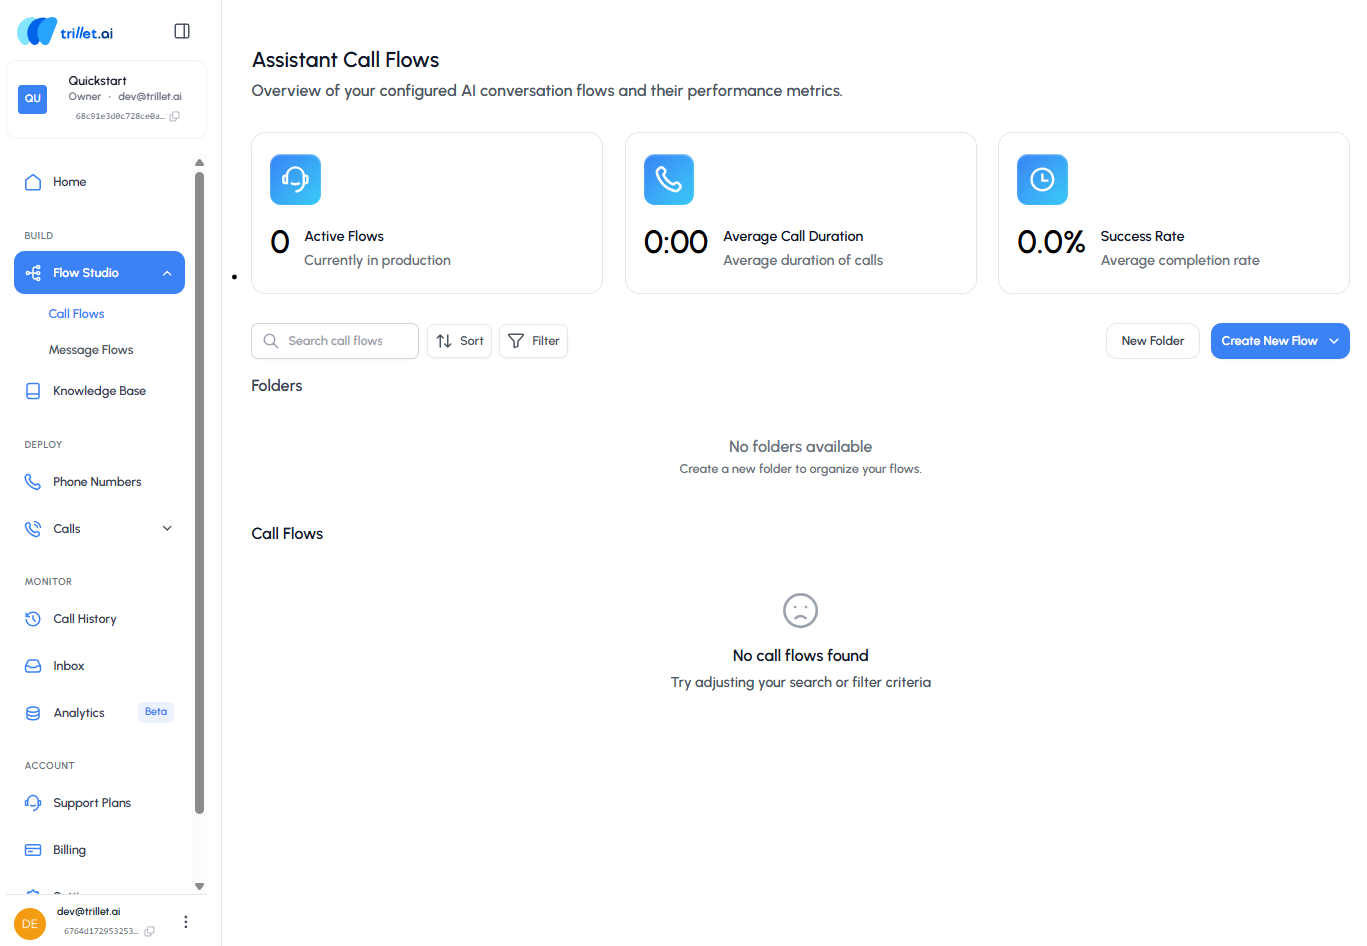
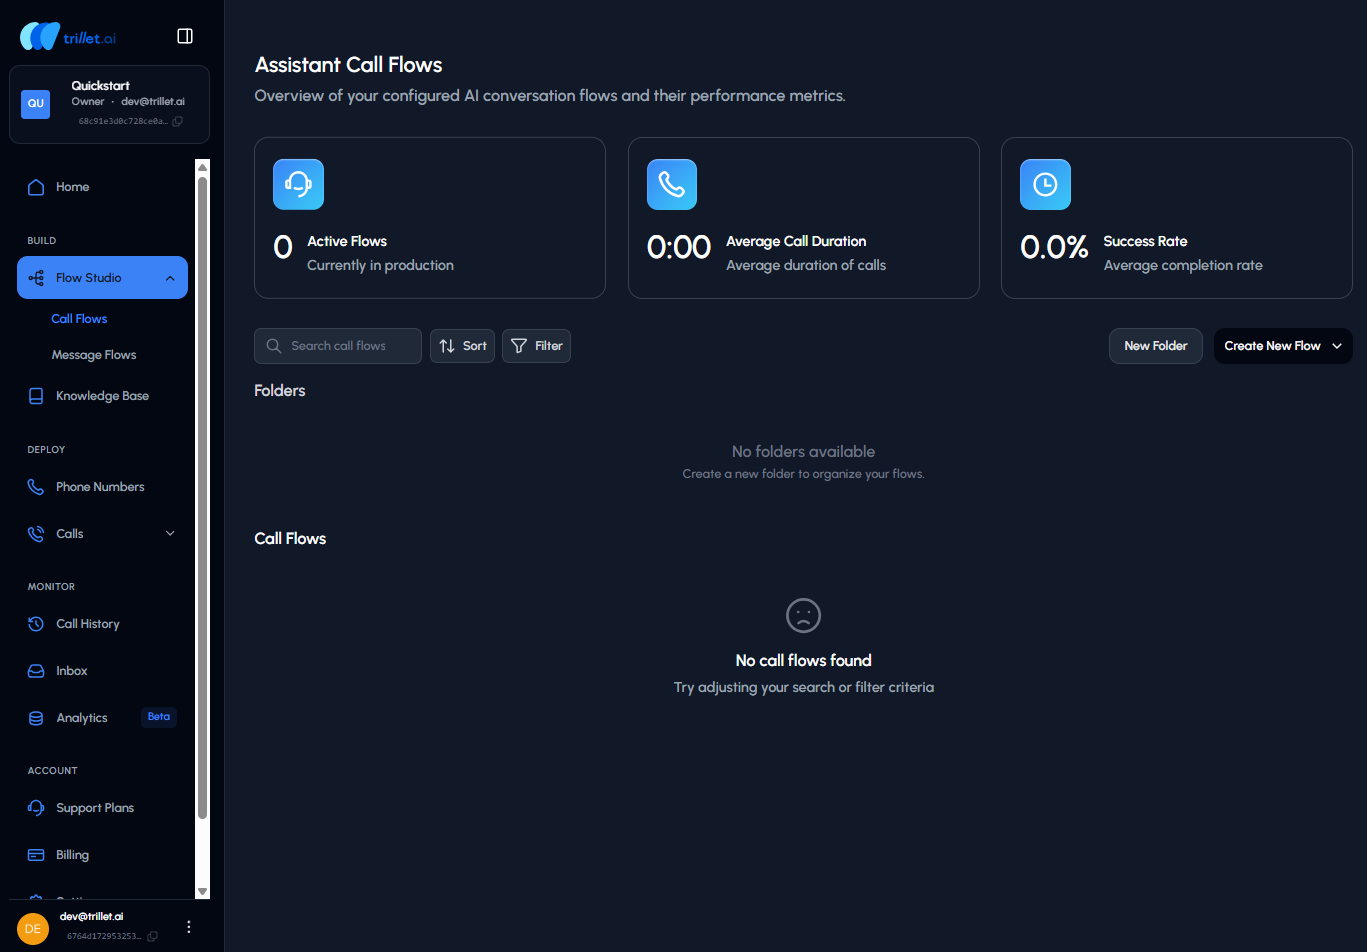 - As you create call flows, they'll appear here for quick access
- You can also add personal folders to keep your work organized
To begin building your first flow, click the **Create New Flow** button.
## 1.1 Create a Call Flow from Scratch
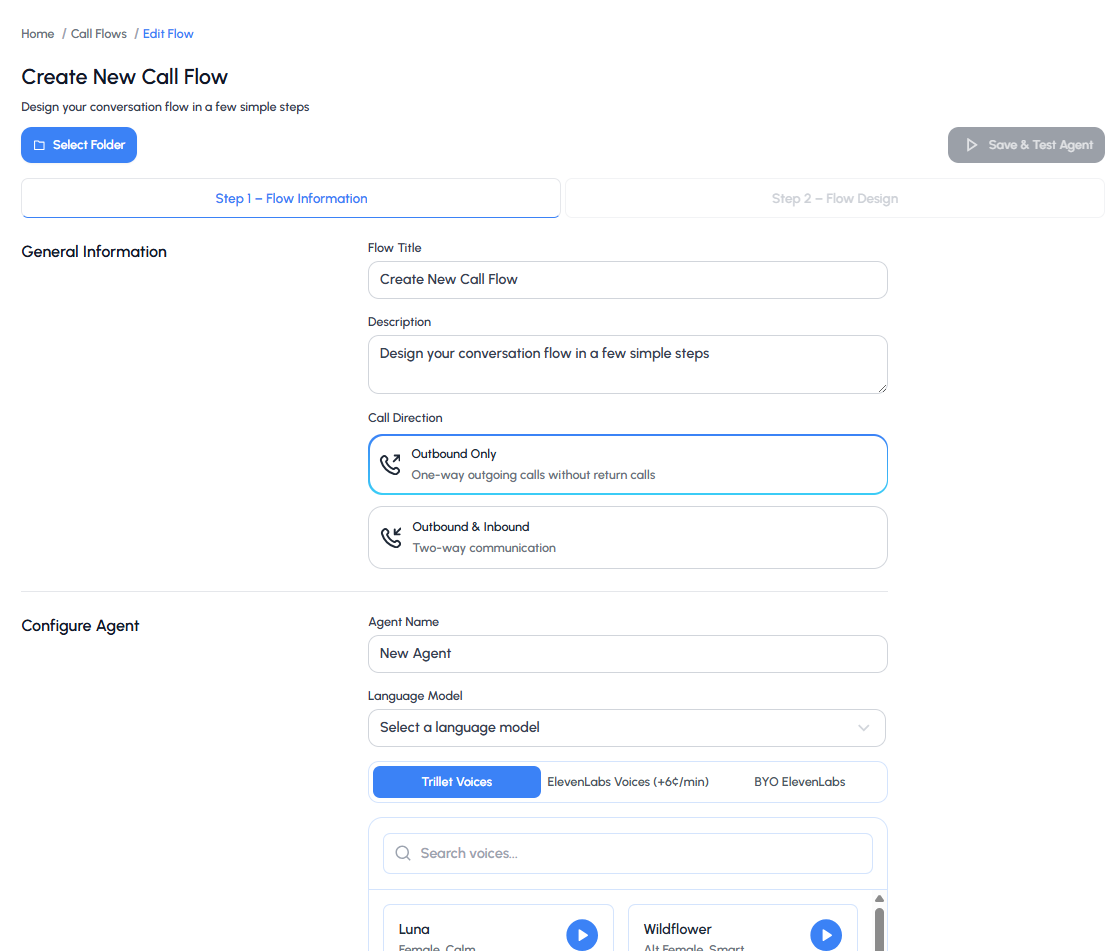
Trillet gives you the ability to customize your agent and choose how it communicates with users.
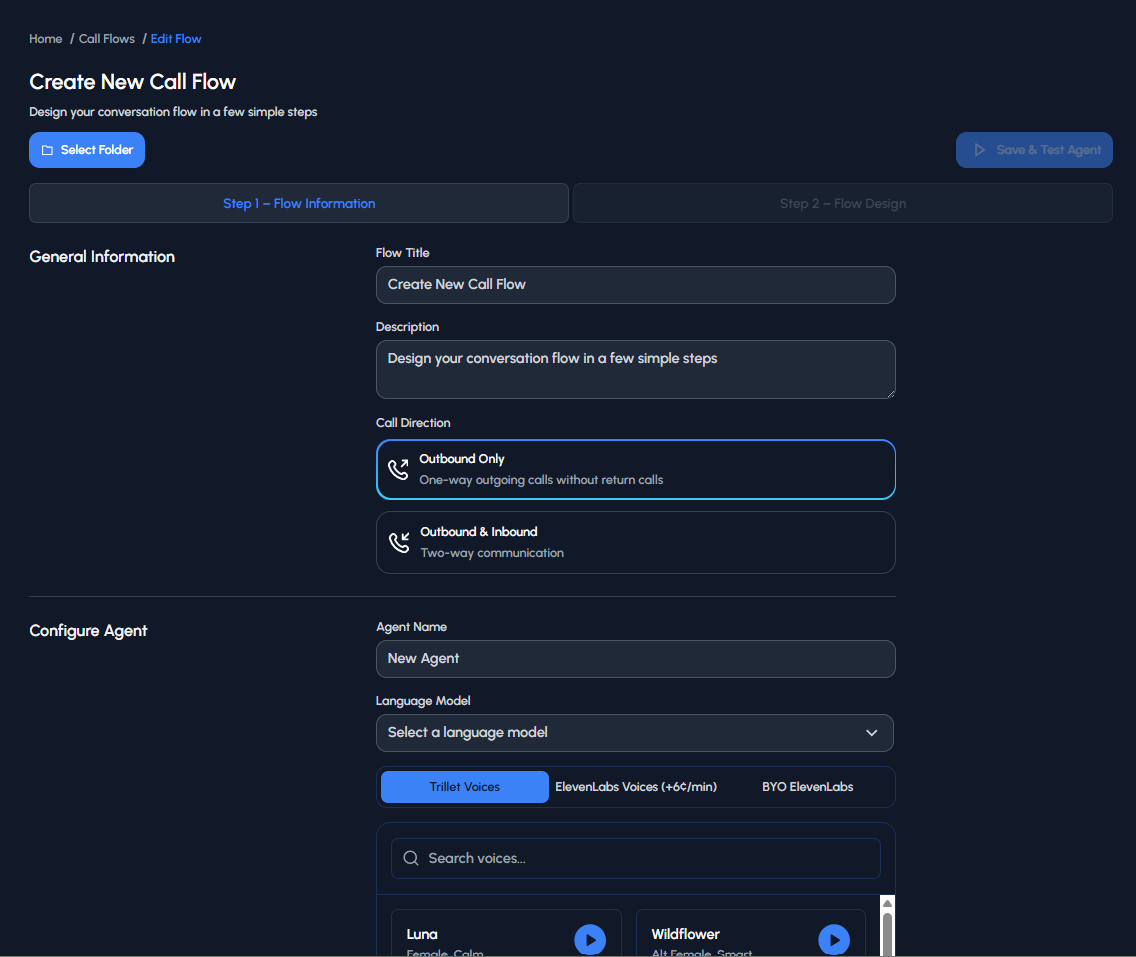
On this page, you'll set the foundation for your AI agent by giving it a name, defining its purpose, and selecting the right call direction, voice, and language model. Think of this as your agent's "identity card" - the details you set here define how it looks, sounds, and behaves during conversations.
- As you create call flows, they'll appear here for quick access
- You can also add personal folders to keep your work organized
To begin building your first flow, click the **Create New Flow** button.
## 1.1 Create a Call Flow from Scratch
Trillet gives you the ability to customize your agent and choose how it communicates with users.
On this page, you'll set the foundation for your AI agent by giving it a name, defining its purpose, and selecting the right call direction, voice, and language model. Think of this as your agent's "identity card" - the details you set here define how it looks, sounds, and behaves during conversations.
 ### Configuration Steps
**Select Folder**
- Choose the folder where you want to save this call flow
- Organizing flows into folders helps keep your workspace tidy
**Enter Flow Information**
- **Flow Title**: Give your call flow a descriptive name (e.g., Sales Demo Flow)
- **Description**: Add a short explanation of what this flow is for (optional, but useful if you have multiple flows)
- **Call Direction**:
- **Outbound Only**: one-way outgoing calls without return calls
- **Outbound & Inbound**: two-way conversations where the agent can also receive calls
Select the option that matches your use case.
**Configure Your Agent**
- **Agent Name**: Assign a name to your agent. This is how it will appear across your workspace
- **Language Model**: Select the AI model that powers your agent's responses (see [Call Agents API](/v1/api-reference/endpoints/agents/call/create) for available models)
- **Voice Options**: Choose from available voices:
- Trillet AI Voices (default, included)
- ElevenLabs Voices (premium, additional cost)
- BYO ElevenLabs (bring your own ElevenLabs account) [You will need to ensure that you have added the voices to your ElevenLabs account first under 'My Voices' and that the necessary privileges are provided to the API key.]
- **Flow Generator**: Trillet gives you the ability to turn an existing call recording into a ready-to-use call flow
Once you've filled in the details, click **Next** (bottom right) to move on to prompting your agent.
## 1.2 Prompting Your Agent
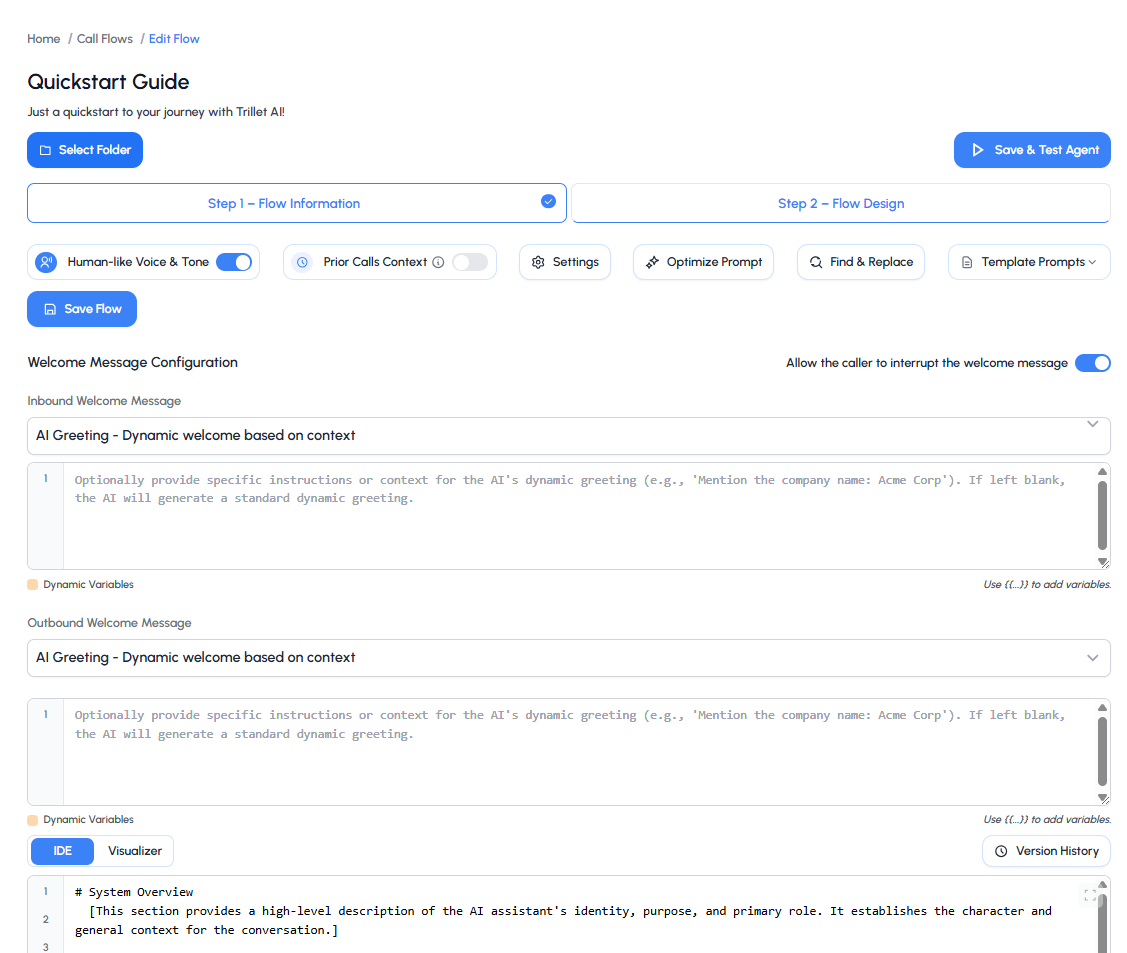
The way you prompt your agent determines how well it performs during conversations. Think of it like giving instructions to a teammate before they step into a meeting - the clearer and more specific you are, the better they'll handle the interaction.
You can also choose how your agent starts off the call — whether that's waiting for the caller to speak first, using an AI-generated greeting that adapts to context, or delivering a custom greeting you've written yourself.
### Configuration Steps
**Select Folder**
- Choose the folder where you want to save this call flow
- Organizing flows into folders helps keep your workspace tidy
**Enter Flow Information**
- **Flow Title**: Give your call flow a descriptive name (e.g., Sales Demo Flow)
- **Description**: Add a short explanation of what this flow is for (optional, but useful if you have multiple flows)
- **Call Direction**:
- **Outbound Only**: one-way outgoing calls without return calls
- **Outbound & Inbound**: two-way conversations where the agent can also receive calls
Select the option that matches your use case.
**Configure Your Agent**
- **Agent Name**: Assign a name to your agent. This is how it will appear across your workspace
- **Language Model**: Select the AI model that powers your agent's responses (see [Call Agents API](/v1/api-reference/endpoints/agents/call/create) for available models)
- **Voice Options**: Choose from available voices:
- Trillet AI Voices (default, included)
- ElevenLabs Voices (premium, additional cost)
- BYO ElevenLabs (bring your own ElevenLabs account) [You will need to ensure that you have added the voices to your ElevenLabs account first under 'My Voices' and that the necessary privileges are provided to the API key.]
- **Flow Generator**: Trillet gives you the ability to turn an existing call recording into a ready-to-use call flow
Once you've filled in the details, click **Next** (bottom right) to move on to prompting your agent.
## 1.2 Prompting Your Agent
The way you prompt your agent determines how well it performs during conversations. Think of it like giving instructions to a teammate before they step into a meeting - the clearer and more specific you are, the better they'll handle the interaction.
You can also choose how your agent starts off the call — whether that's waiting for the caller to speak first, using an AI-generated greeting that adapts to context, or delivering a custom greeting you've written yourself.
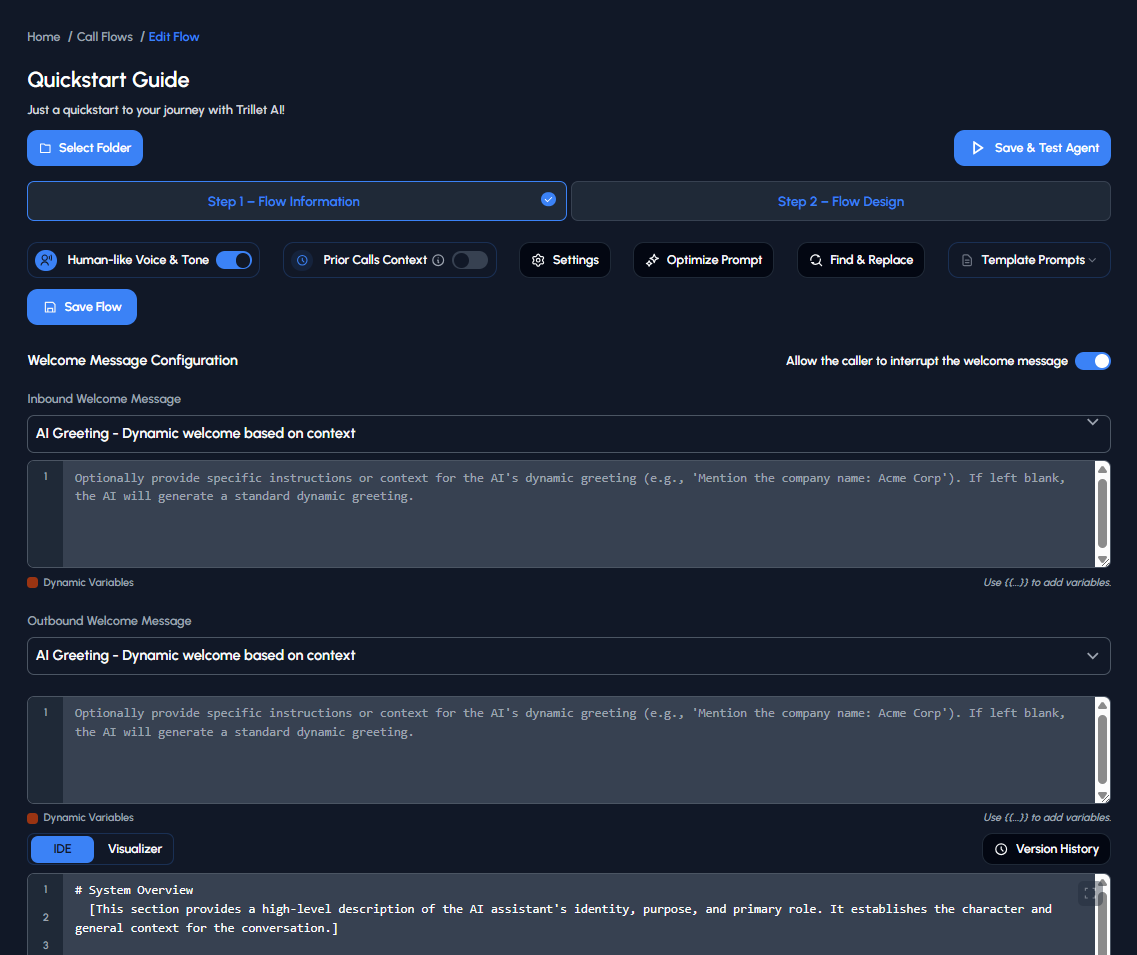 ### Writing Effective Prompts
A strong prompt usually includes:
- **A clear goal** → what is the agent trying to achieve on this call?
- **Background context** → who is the agent, and what key details should they know?
- **Conversation flow** → the step-by-step path the agent should follow to reach the goal
### Using the Prompt Template
To make this easier, Trillet provides a prompt template you can follow. Instead of starting from scratch, the template gives you a ready-made structure that covers all the essentials: defining your agent's role, setting formatting rules, and mapping out the conversation flow.
**Example Prompt Structure:**
If your agent's goal is to qualify leads for a demo, your prompt might:
- Set the goal as confirming interest and booking a demo slot
- Provide background context like "You are Alex, a friendly sales assistant from Acme Software"
- Outline a conversation flow where the agent greets the lead, confirms their availability, and suggests two demo times
### Testing Your Agent
You can test your agent through both **Voice Chat** and **Text Chat**. **Voice Chat** lets you experience how it sounds in a live call, while **Text Chat** makes it easy to review responses in writing. Both methods allow you to fine-tune your prompt and improve the agent's performance.
### Writing Effective Prompts
A strong prompt usually includes:
- **A clear goal** → what is the agent trying to achieve on this call?
- **Background context** → who is the agent, and what key details should they know?
- **Conversation flow** → the step-by-step path the agent should follow to reach the goal
### Using the Prompt Template
To make this easier, Trillet provides a prompt template you can follow. Instead of starting from scratch, the template gives you a ready-made structure that covers all the essentials: defining your agent's role, setting formatting rules, and mapping out the conversation flow.
**Example Prompt Structure:**
If your agent's goal is to qualify leads for a demo, your prompt might:
- Set the goal as confirming interest and booking a demo slot
- Provide background context like "You are Alex, a friendly sales assistant from Acme Software"
- Outline a conversation flow where the agent greets the lead, confirms their availability, and suggests two demo times
### Testing Your Agent
You can test your agent through both **Voice Chat** and **Text Chat**. **Voice Chat** lets you experience how it sounds in a live call, while **Text Chat** makes it easy to review responses in writing. Both methods allow you to fine-tune your prompt and improve the agent's performance.
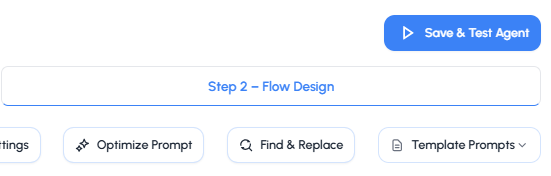
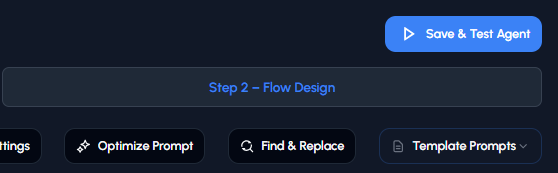
When you're ready to test, click the **Save & Test Agent** button in the top-right corner of the prompt editor.
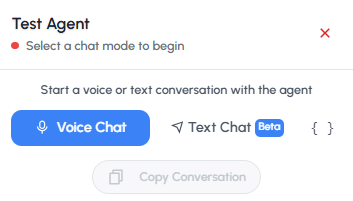
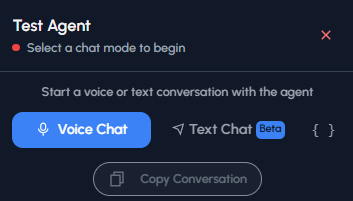
- **Voice Chat** lets you experience how it sounds in a live call - **Text Chat** makes it easy to review responses in writing Both methods allow you to fine-tune your prompt and improve the agent's performance.
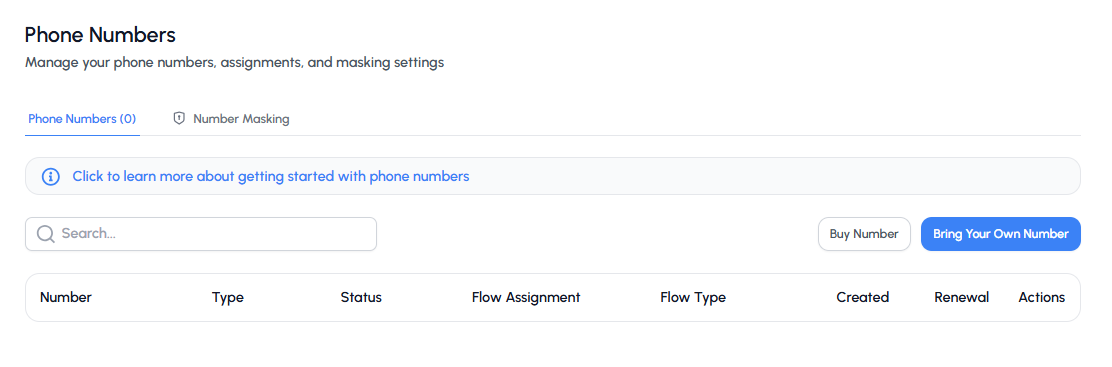
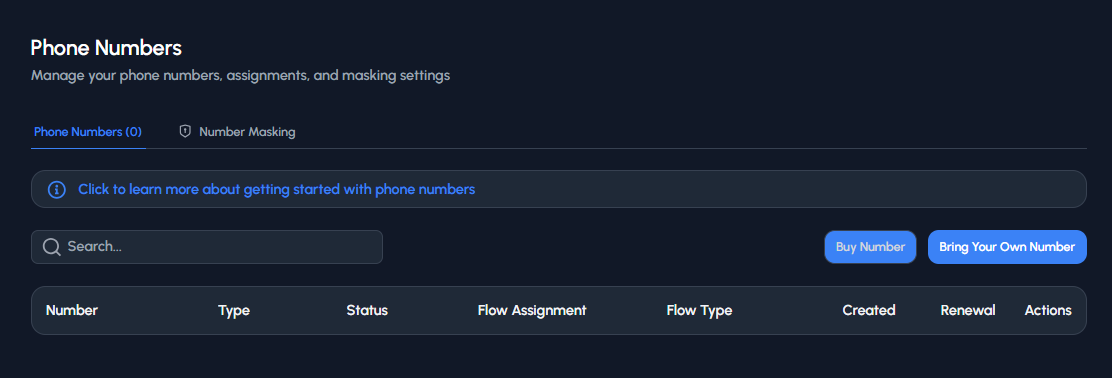 ### Number Options
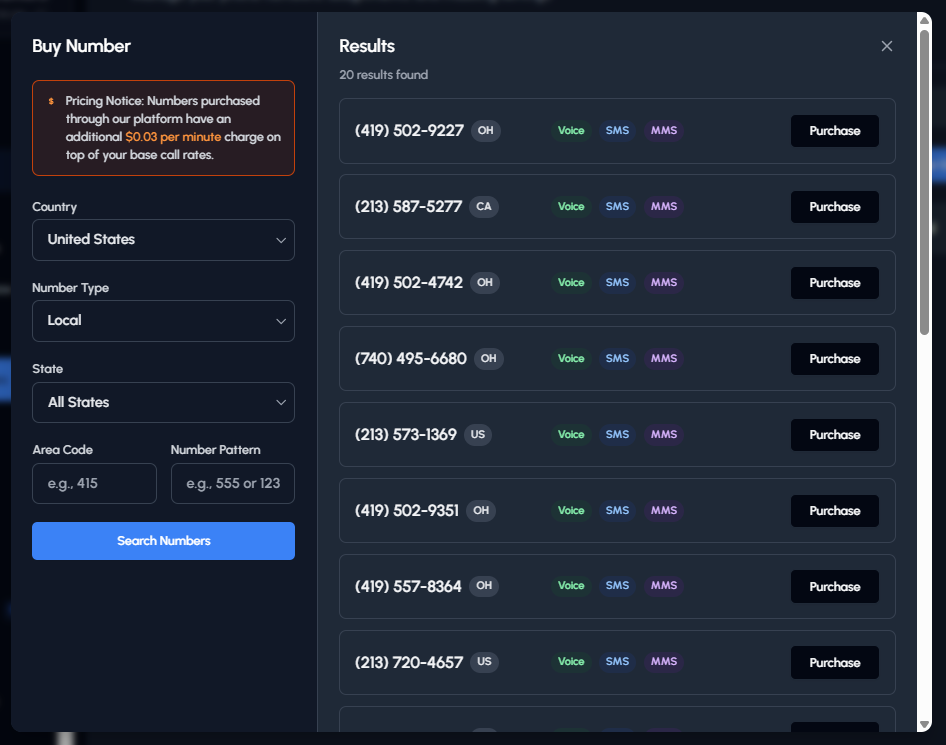
Trillet gives you two options:
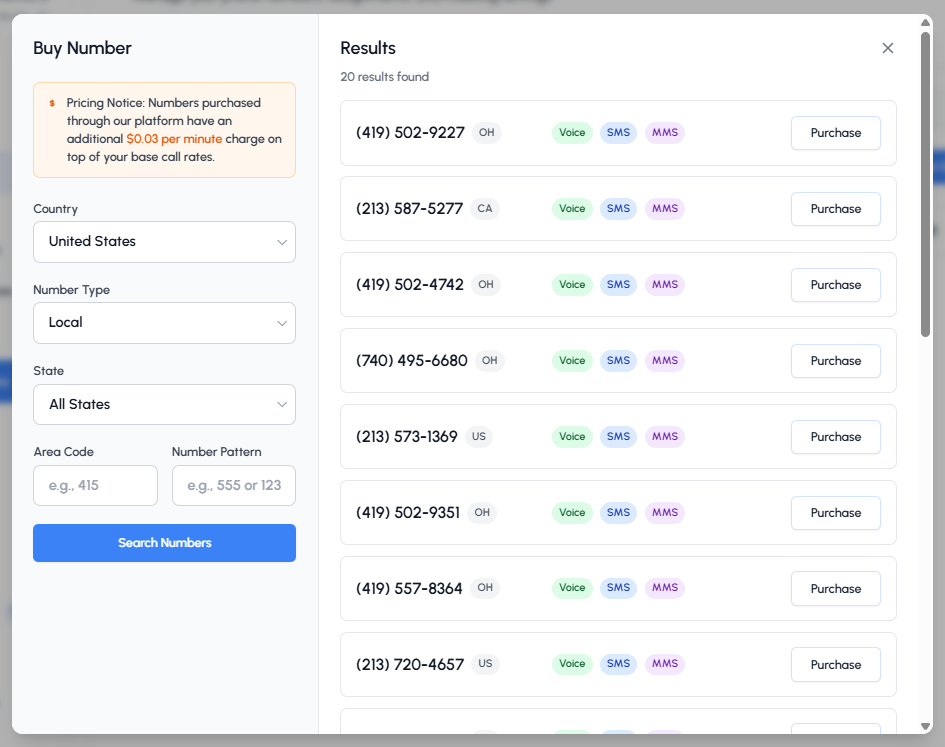
**1. Buy a New Number**
- Purchase directly through the platform
- Quick setup and ready to use right away
- Search by country, type (local or toll-free), state, or area code
### Number Options
Trillet gives you two options:
**1. Buy a New Number**
- Purchase directly through the platform
- Quick setup and ready to use right away
- Search by country, type (local or toll-free), state, or area code
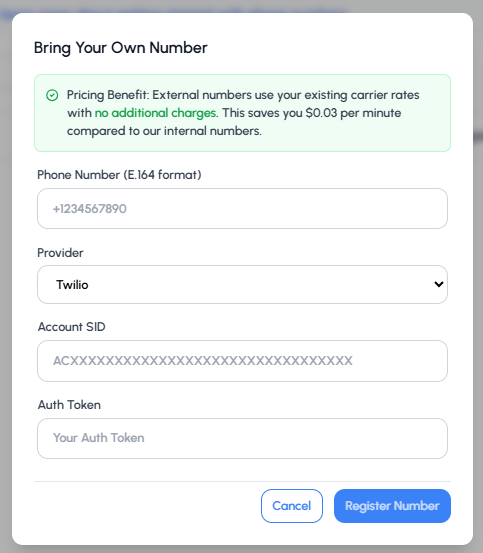
 **2. Bring Your Own Number**
- Link an existing number from providers like Twilio
- Keep using your existing carrier rates
- Manage everything from within Trillet
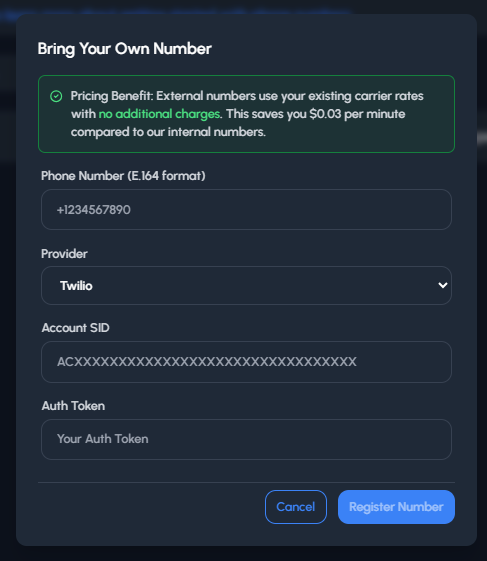
**2. Bring Your Own Number**
- Link an existing number from providers like Twilio
- Keep using your existing carrier rates
- Manage everything from within Trillet
 ### Number Assignment
Once you have a number, you can assign it to your AI agent:
### Number Assignment
Once you have a number, you can assign it to your AI agent:
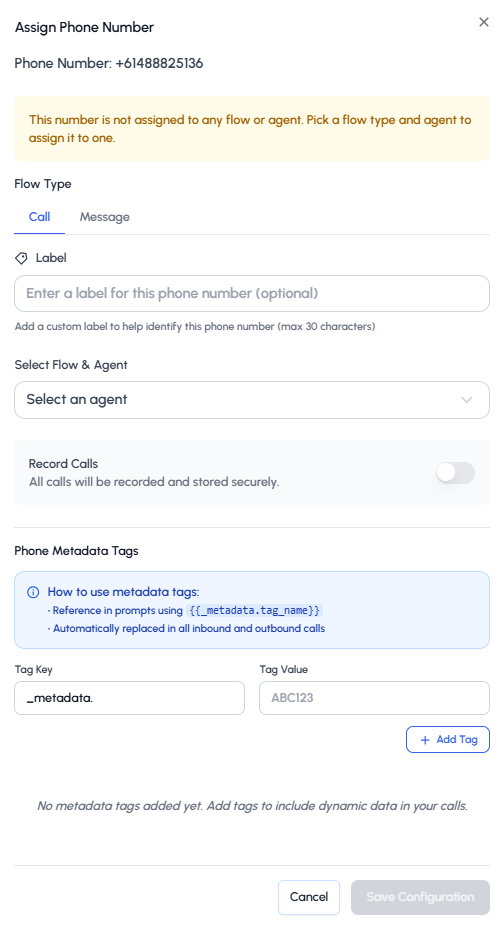
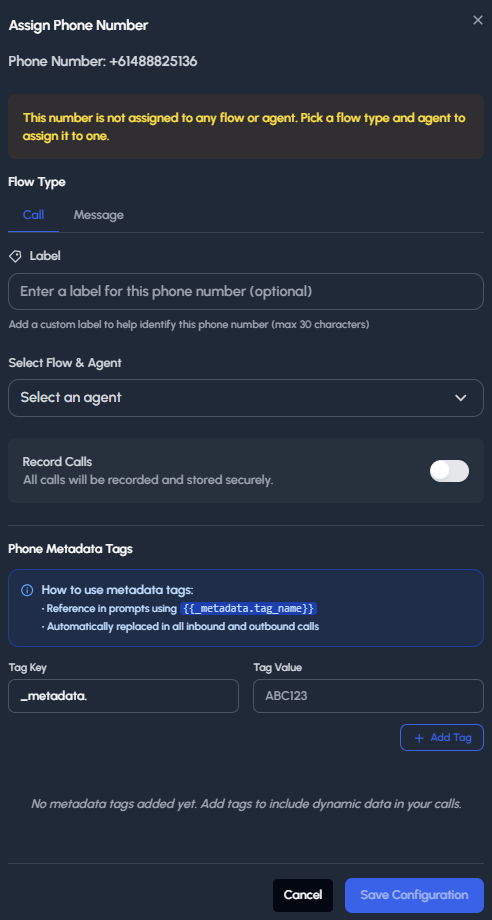 Configuration options include:
- Choose whether to assign to a call or message flow
- Select the agent it should connect with
- Enable call recording
- Add metadata tags for dynamic interactions
### Next Steps After Assignment
Once your number is linked, you can configure:
- Maximum call duration
- Call recording settings
- Business hours
- Call or Message flow assignment
When everything is configured, your number is live and ready. Make a quick test call to confirm everything works as expected.
## 1.4 Sending and Receiving Calls
Once a phone number is assigned to your AI agent, you can configure how it handles incoming and outgoing calls.
### Single Calls
To assign a single number: go to **Sidebar → Calls → Single Call**
Simply select the agent you want to map the number to (the same agent you assigned the phone number to) and enter the number where you'd like to receive the calls.
You can also use our [Voice Calls API](/v1/api-reference/endpoints/calls/initiate-call) to programmatically initiate calls:
```bash
curl -X POST https://api.trillet.ai/v1/api/call \
-H "x-api-key: YOUR_API_KEY" \
-H "x-workspace-id: YOUR_WORKSPACE_ID" \
-H "Content-Type: application/json" \
-d '{
"call_agent_id": "your_agent_id",
"to": "+1234567890"
}'
```
### Batch Calls
Trillet also gives you the ability to place batch calls. To access this feature: **Sidebar → Calls → Batch Calls**
Batch Calls let you reach multiple contacts at once instead of dialing them individually. This is especially helpful for:
- Lead reactivation campaigns
- Appointment reminders
- Survey collection
- Follow-up calls
**Setup Process:**
1. Select an agent
2. Upload a CSV file with contact details
3. Schedule when the calls should go out
4. Review past batches under "View History" to track performance
Configuration options include:
- Choose whether to assign to a call or message flow
- Select the agent it should connect with
- Enable call recording
- Add metadata tags for dynamic interactions
### Next Steps After Assignment
Once your number is linked, you can configure:
- Maximum call duration
- Call recording settings
- Business hours
- Call or Message flow assignment
When everything is configured, your number is live and ready. Make a quick test call to confirm everything works as expected.
## 1.4 Sending and Receiving Calls
Once a phone number is assigned to your AI agent, you can configure how it handles incoming and outgoing calls.
### Single Calls
To assign a single number: go to **Sidebar → Calls → Single Call**
Simply select the agent you want to map the number to (the same agent you assigned the phone number to) and enter the number where you'd like to receive the calls.
You can also use our [Voice Calls API](/v1/api-reference/endpoints/calls/initiate-call) to programmatically initiate calls:
```bash
curl -X POST https://api.trillet.ai/v1/api/call \
-H "x-api-key: YOUR_API_KEY" \
-H "x-workspace-id: YOUR_WORKSPACE_ID" \
-H "Content-Type: application/json" \
-d '{
"call_agent_id": "your_agent_id",
"to": "+1234567890"
}'
```
### Batch Calls
Trillet also gives you the ability to place batch calls. To access this feature: **Sidebar → Calls → Batch Calls**
Batch Calls let you reach multiple contacts at once instead of dialing them individually. This is especially helpful for:
- Lead reactivation campaigns
- Appointment reminders
- Survey collection
- Follow-up calls
**Setup Process:**
1. Select an agent
2. Upload a CSV file with contact details
3. Schedule when the calls should go out
4. Review past batches under "View History" to track performance
 ### Transfer Setup Steps
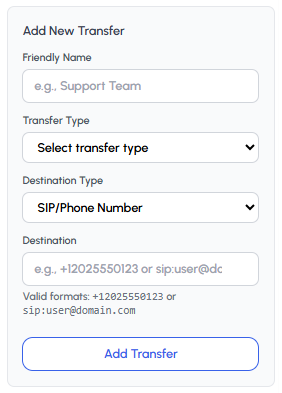
1. **Click Add New Transfer**
2. **Enter a friendly name** (e.g., Support Team)
3. **Select the transfer type**
4. **Choose the destination type** (Phone Number/SIP Address or Phone Metadata Tags)
5. **Enter the destination** in the valid format:
- Phone: `+12025550123`
- SIP: `sip:user@domain.com`
6. **Save your transfer** - your agent will now know where to route calls when triggered
### Transfer Types
- **Warm Transfer**: Agent stays on the line during handoff
- **Cold Transfer**: Agent immediately transfers and disconnects
### Transfer Setup Steps
1. **Click Add New Transfer**
2. **Enter a friendly name** (e.g., Support Team)
3. **Select the transfer type**
4. **Choose the destination type** (Phone Number/SIP Address or Phone Metadata Tags)
5. **Enter the destination** in the valid format:
- Phone: `+12025550123`
- SIP: `sip:user@domain.com`
6. **Save your transfer** - your agent will now know where to route calls when triggered
### Transfer Types
- **Warm Transfer**: Agent stays on the line during handoff
- **Cold Transfer**: Agent immediately transfers and disconnects
 ## Image
### Using Markdown
The [markdown syntax](https://www.markdownguide.org/basic-syntax/#images) lets you add images using the following code
```md

```
Note that the image file size must be less than 5MB. Otherwise, we recommend hosting on a service like [Cloudinary](https://cloudinary.com/) or [S3](https://aws.amazon.com/s3/). You can then use that URL and embed.
### Using Embeds
To get more customizability with images, you can also use [embeds](/writing-content/embed) to add images
```html
## Image
### Using Markdown
The [markdown syntax](https://www.markdownguide.org/basic-syntax/#images) lets you add images using the following code
```md

```
Note that the image file size must be less than 5MB. Otherwise, we recommend hosting on a service like [Cloudinary](https://cloudinary.com/) or [S3](https://aws.amazon.com/s3/). You can then use that URL and embed.
### Using Embeds
To get more customizability with images, you can also use [embeds](/writing-content/embed) to add images
```html
 ```
## Embeds and HTML elements
```
## Embeds and HTML elements
{title}
... snippet content ...